Friday, April 15, 2011

Sand Origins Lab

Introduction: There are two main origins of sand. One origin is biogenic, meaning it comes from something living. The other is detrital, meaning it is something that comes from non-living sources. You can test the sand to find it's origin by adding vinegar and observing the sample. Calcium carbonate (CaCO3) is the biogenic material in sand. The calcium carbonate has a chemical reaction with the vinegar (CH3COOH) creating, in part, carbon dioxide (CO2) making the sand snap crackle and pop! The formula is CH3COOH+CaCO3---->Ca(CH3COOH)2+H2O+CO2. The amount that the sand reacts to the vinegar shows how much or if the sand has biogenic material.


Question: Is the sand at the Cove and Kam II mainly biogenic, or detrital?


Hypothesis: I think that the sand at the Cove will be mainly biogenic because of its light color, fine texture, and coral pieces. I think Kam II is mainly detrital because there is no shielding and the sand is a moderately dark tan color. If my hypothesis is incorrect about the Cove, it most likely has more detrital shielding than can be seen from the shore. If my hypothesis is incorrect about Kam II, the beach may have biogenic shielding that cannot be seen from the shore.


Materials:


  • Paper/Journal


  • Pencil


  • Permanent marker


  • Pipette


  • Vinegar


  • Small beakers


  • Containers to take sand samples


  • Tape to label containers (optional)


  • Sand Samples


  • Safety goggles

Procedure:


  1. Take samples of sand you would like to test. Make sure you label them with the date and beach name.


  2. When at the beaches you are taking samples from, jot down some observations of the beach structure and sand.


  3. To test the sand, poor a thin layer of sand into a small beaker. (enough to cover the bottom)


  4. Use the pipette to drip vinegar into the sample. Don't soak it; only add 20 drops dispersed over the surface of the sand.


  5. Observe and record the reaction that the vinegar has with the sand. (CH3COOH+CaCO3---->Ca(CH3COOH)2+H2O+CO2)


  6. Repeat steps 3-5 for every sample you test.


Data:


Field Observations:


The Cove: Like colored colar pieces and rocks, tan colored and fine grain sand, Lava rock shielding surronding beach.


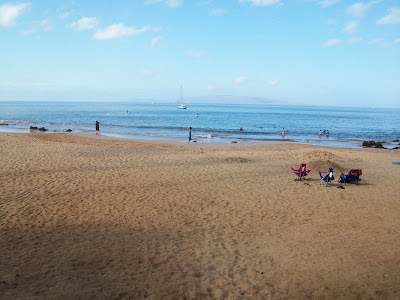
The Cove looks similar to the beach shown here.


Kam II: No shielding, lava orcks to the south, and tan colored sand.


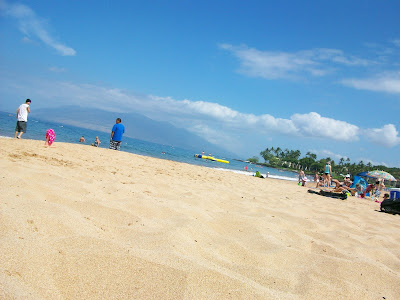
Kam II looks similar to the beach shown above.


Waipulani: Biogini shielding, coran, algea, medium grain sand, and light tan colored sand.


Sugar Beach: Armor, no other shielding, dark tan sand, and medium grain.


Data Analysis:


Conclusion:


In this lab experiement, the goal was to determine whether the sand samples from The Cove and Kamaole II were biogenic or detrital. In my hypothesis, I thought that the sand at The Cove would be mainly biogenic because of its light color, fine texture, and coral pieces. This part of my hypothesis was correct. I also thought that Kamaole II was going to be detrital because of no shielding and the sand's moderatelty dark sand color. This part of my hypothesis was incorrect. It was found out that both beaches were biogenic. Both sand samples (containg calcium carbonate) from beach had noticable reaction (bubbles and cracking sounds) with vinegar (acetic acid).


A possible source of error in this experiment could be that the bacteria in the samples could have triggered the reaction and therefore affected the result. Another error could be from vinegar which was diluted with water (not a pure vinegar).

Monday, March 28, 2011

Humpback Whale Observation Lab continued...

This graph displays my lab results. The results showed that there were more whales in the beginning of the season than the end. Conclusion: (Look back to the last blog entry for the question, hypothesis, and earlier lab information.) The data I was able to collect told me that I either had too many sources of error to get accurate results or that my hypothesis was incorrect. There turned out to be less calves spotted the second time, but only by one count. Possible Sources of Error:

  • There were times when we could not see the whales we spotted well enough to know their actions or the type of pod.

  • Since some of the pod types were unclear, there could have been more calves that were not counted.

  • Collecting the two sets of data at different times might have effected the results because the whales may have a certain “schedule”.
My Experience on the Whale Watch: The whale watch I went on for my second data collection was great. I hadn't been on a boat in a long time before that. We spent the first half hour of the watch collecting data, because that's about how long our first data collection was. I collected the data and my partner took pictures. After that, we had the rest of the time to enjoy the boat. There was nice sunny weather with some clouds, lots of whales, and a snack bar. I'm very glad I brought my sunglasses along. I would have had a harder time looking for whales without them. I was disappointed that I didn't see any turtles (I usually do), but one of the whales coming close up to the boat made up for it. This may have been the last school outing I will have before my high school graduation. I'm glad it turned out really good. :)

Sunday, January 30, 2011

Humpback Whale Observation Lab

Purpose of Our Whale Observation: To analyze one of the multiple variables associated with the observation of Maui’s humpback whale populations.

My Research Question: How many more humpback calves were spotted earlier in the season than later?

Hypothesis: I predict that we will find more humpback calves later in the season because more will be born.

My Experience with the First Whale Observation: The whale observation at McGregor's Point on Maui went alright for me. What I liked most was finding out about the location for the first time. It has an outstanding view of the ocean. There were a few challenges that I came across. I should have been prepared with a hat or sunglasses for the sunny sky. It was difficult to see much without squinting harshly or shading my eyes with my hand. It was also difficult to spot the number of whales and the pod type from so far away without binoculars. It was also very challenging to estimate the whales' direction of travel. During the first half of our time there, we were able to spot quite a few whales. We couldn't see any during about the second half of our time frame there. I was satisfied with being able to at least see some whales on this trip.

Procedure:
1) Gather all of your materials and go to a place on Maui with a wide, clear view of the ocean (in this case, McGregor's Point).
2) Look out for any signs of whales.
3) When you find one or more whales, record the time and date of the observation on your data sheet.
4) Using your binoculars (if you have a pair), observe the number of whales, pod type, behaviors, and direction of travel. Be sure to record this information on the data sheet.
5) Use your clinometer to find the distance of the whale(s) and record this on your data sheet.
How to use a clinometer:
  1. Look through the tube at the top of the tool so that you can see the whale(s).
  2. Hold the hanging string in place against the protractor in the exact position it's in when you look through the tube.
  3. Record the number (the one less than 90) on a scratch sheet of paper. This is the angle of inclination of your view of the target.
  4. Find your elevation using a GPS and also record that on the scratch sheet of paper.
  5. Plug these two pieces of information into the equation Distance = Elevation x tan(angle of inclination).
  6. Solve this equation using a scientific calculator. On your calculator in this order, punch in the angle of inclination, tan, x (multiply), then the elevation.
  7. This number is the approximate distance from you to the whale(s) (in whichever unit of measurement you found your elevation).
6) Repeat steps 2-5 for every whale or pod you spot. Be sure not to record the same whales more than once.

Wednesday, January 5, 2011

Marine Phyla Lab

My class has was studying 9 marine phyla. Porifera are sponges. Cnidarians are jellyfish, sea anemones, and corals. Platyhelminthes are flat worms. Nematoda are round worms. Molluska are organisms like snails, slugs, squid, and octopi. Annelids are segmented worms. Arthropoda are insects, arachnids, and crustaceans. Echinoderms are sea stars, brittle stars, and sea urchins. Chordata are fish. We counted how many of each we could find in the Waipulani tide pools in Kihei, Hawaii. We used ID books to identify the organisms.

The research question was Which marine Phyla are present at the Waipulani tide pools of South Maui, and which Phyla are most represented in diversity and quantity? In my hypothesis, I thought we would find Cnidarians, Molluska, Arthropoda, Echinoderms, and Chordata, because my class found them in the tide pools during the first visit. We did not find any Cnidarians or Echinoderms. We did find Molluska, Arthropoda, and Chordata. I also thought that the Arthropoda would be most diverse based on the different kinds of crustaceans found earlier. Molluska turned out to be the most diverse. I inferred there would be the greatest number of Molluska, because the most organisms we saw on the first trip were Pipipi or something very similar. This guess was correct.
There are many possible sources of error that could have altered our results
in this data collection. Individual pieces of data could have been counted more than once. The transect line could have been laid in a biased place. The person counting could have scared some organisms away by accident. Organisms could have been hidden where the person looking could not see them. The tide could have been too high or low to show the normal amount and types of organisms. The identification of organisms could have been faulty. Some of these errors could be and were prevented, others could not
I thought this lab was pretty fun and interesting. I think I would have liked it a lot better if
we found more of a variety of organisms. What I liked that most was learning about marine phylum using a hands on experience rather than just using classroom methods. This is Advanced Science Research Methods.
I learned some new techniques wh
en sketching a map of the research area that were helpful. I have a better understanding of the 9 phyla.

Wednesday, November 17, 2010

Geocaching Unit

Introduction to Geocaching

~Geocaching is a great way to add some more fun and exploration into your outdoor recreation. Geocaching is an activity that utilizes a GPS (Global Positioning System) to find a "cach" at particular coordinates. A cach is something left at a specific location for geocachers to find. It is most often a container with items inside and a list for visitors to write their names. These types of caches are the most popular, but there are also other types. You can find out more about geocaching at www.geocaching.com, and create a free account!


What I've Learned

~I've definitely improved my skills using GPS during this unit. I have a better idea of how to move through the menus and selections, and can do it much faster than before. I have learned how to use a GPS before learning about it in this unit, but it was a very useful review!
~I learned a lot more about geocaching. I made an account on geocaching.com and know how to find information and coordinates of caches. I also learned that you should try to find caches that have been found by other people recently. If they have not, it may have been removed or relocated.


My Groups' Geocaching Results

~On the first hunt, my group did not find one cach. The biggest reason for this was poor planning. We didn't know where the coordinates were when we chose the points. We entered some of them into the GPS after we left the classroom. We thought that on of the caches was at 5 Graves, but all of the ones we chose turned out to be in the Makena/La Perus area. We searched too broad of an area for caches online.
~The second time, all three caches that we chose were in Kihei, but we could not find any of them. We did have a forth cache near the Wailea Fire Department, which we were able to find. Good thing too; it was our last hope!

Tuesday, October 19, 2010

Termite Colony Observations

<< Sketch of initial jar setup.

Materials used:
  • About 1" x 1" x 1/4" piece of Douglas Fir wood
  • 120 grams silica sand
  • 18 ml of water
  • termites


Changes in the Habitat Over Time:

Substrate(sand)-During the month after the jar was set up, tunnels were built in the sand. The tunnels were not strong enough to hold when the jar was shaken up. Some tunnels were rebuilt in the sand after that.
Piece of wood-I saw little, to no, change in the wood. I believe the termites did build a tunnel to the wood though.
Moisture content-All the water was pored on one side of the sand. The moisture was eventually soaked up by the rest of the sand. The wood looked a little moist.
Termite activity level
-When the termites were first put in, they were scrambling all over the sand and wood in the jar. After the first few weeks, there were less of them that could be seen, because there were probably many in the tunnels. After the jar was shaken, I could see even less termites and they seemed to be busy at work. On the last observation, I saw the least termites and they were either moving very slowly, or not moving at all. :(

Impact of Human Interaction: The jar being shaken demolished their termite town. the tunnels were gone, and the sand surface was a steep slope. The termites were scrambling around the surface. I think they were communicating and trying to figure out how to rebuild the tunnels. I could see less termites.


My opinion on the termite unit: Studying termites was very interesting. Before this unit, I knew very little about them. I didn't realize the organization of the colony. I just knew that they eat wood, look like ants, and sometimes have wings. I think my favorite part was looking at the live protozoa through the microscope. That was the first time I ever watched any live micro-organisms in person. I can't think of any particular thing that I disliked most. The information I learned has already come in handy. I was looking at a house for sale with my family and saw that there were termites by some frass in the downstairs bathroom. I was fascinated by this unit and enjoyed it very much! :)

Friday, August 13, 2010

The Scary Engulfing Plankton Net


Purpose of this tool: To collect plankton and other interesting micro specimen from water.

How to use it:
1. Remove cap from sample vial.

2. Slowly lower net into water.

3. Drag net through water until a reasonable amount of organic material is caught in it.

4. Quickly pull net out of water and let drain.

5. Spray outside of net with fresh water.

6. Cap sample vial and pull out of net.